Zoint Help
We're here to help
Welcome to the world of Zoint!
Zoint is video conferencing solution designed for professionals and especially teaching and learning community. It helps to enrich teaching experience with features like audio, video, chat, presentation, whiteboarding, sharing youtube videos and so on. Using Zoint is very simple. You don't need to sign up or need to download anything to start. Simply type zointvc.com in your browser and there you go. You get the below page –

Instant Meeting
From this home page you can immediately join the instant meeting either by clicking on Join for free link or clicking Instant meeting button.

Enter the meeting name, your name mobile number for OTP and that’s it. You can start the meeting by clicking Create and Join. OTP will be sent to you only for the first time.

The message box that appears has copy invite link to copy the meeting invite details. Copy the invite and send to all whom you want in your meeting.

Clicking Join will start your meeting instantly. So simple isn’t it?
Optionally you can also get the invite details in your email inbox if you choose to receive email by checking the checkbox and entering your email id after you enter meeting name and your name. SMS invite feature can be availed by subscribing to one of our attractive subscription plans.

Join Meeting
From this page itself you can join the meeting organized by others if you know the meeting id and password. Just click on Join meeting link on the top right of the page or Join meeting button at the bottom of the home page as shown below -

Enter your name, meeting id, password and you are in.

You can also join the meeting by clicking on invite link and entering the password that you receives from the meeting organizer. In that case you will have to enter only your name and password.

That’s not it. You get loads of features when you sign up. When you sign in as registered user, you see 4 buttons in logged in home page - Join meeting, Instant meeting, Schedule meeting and Schedule webinar. Join meeting and instant meeting buttons work same as they work on landing page that you see before logging in.
Schedule Meeting
Schedule meeting button allows you to schedule meeting for specific time. Once you click on schedule meeting button, you get a form to key in meeting details as below –

We have kept is very simple for you. You just have to key in meeting name. Your meeting gets scheduled with default values. You can customize your meetings as per your requirement. Message to participants will get displayed when your meeting starts. You can have multiple hosts. You just have to share the host password for them. Those who will join as participants will not have host features enabled when they join the meeting. Here you can give the password of your choice for host as well as for participants if you don’t want to use randomly generated password.
The fields for mobile number and email is to receive the invite on your registered mobile number and your registered email id, so that it is easy for you to forward the meeting invite to your participants from your mobile or from your inbox. If you want to connect with only one person, you can key in mobile number and email address of that person. You can choose the date and time for which you want to schedule the meeting. You can change the default meeting duration. You get 50 minutes duration for free subscription. In case you need meeting durations more than 50 minutes, you can subscribe to one of our attractive subscription offerings.
You can decide on Max participants. By default meeting will be scheduled for 5 participants including you. You can change this number based on your requirement. For free subscription you can allow up to 10 maximum participants. In case you need more participants, you can have it with subscription plans.
The advanced options allow customizing the meeting further. Disable private chat will disable private chat between the participants; Disable public chat will disable it for all the participants. Mute on start option will mute all the participants when the join. They can unmute after joining. Disable note will not allow participants to use notes feature. Disable mic will join users only as listeners. Disable cam will not allow users to share their video. Disable recording will not allow you to record the meeting. Record on start will start meeting recording as soon as the meeting starts. You can choose this option in case you don’t want to miss recording of any particular meeting.

Schedule Webinar is similar to schedule meeting. Webinar will by default disable attendees mic, camera, private chat. You can further customize based on changing the general and advanced options that are available.
There is a dashboard on the right hand side. It will show up scheduled meetings and webinars. Filter on the dashboard allows you to display meetings and webinars for this week, next week and even all your scheduled meetings and webinars. Join button for each of these meetings or webinars allows you to join your meetings immediately. Copy invite link copies the invite details that can be sent to attendees.

My Zoint
Zoint offers you creating personalized rooms. My Zoints are nothing but the rooms that you create. Advantage for using zoints is that the zoint URL will not change. You can share the URL to your group of participants and they can join any time you join the Zoint. When you click on My Zoints, all your zoints will be displayed as below –

Options to copy the invite details, edit the zoint features, delete the zoint or join the zoint are given on each of the zoints.
Creating a Zoint is very simple. Click on + button available in front of My Zoints tab. A form to create New Zoint opens up. Give the Zoint name, enter the number of participants you want. Leave the set password field blank, if you dont want your participants to enter the password while joining. In such case they will have to just enter their name to join the zoint. If you already have populated My Contacts with the list of contacts, you can select the contacts for the particular Zoint. Selected contacts will be able to see your Zoints in their My Connect tab if they are registered with us. If you don’t want to miss on recording then check the Recording on start check box, so that you don’t have to remember to click on record button when the meeting has started.

For free subscription, maximum 5 users including you can join. For more number of users you can visit our attractive subscription offerings.
My Connect
In this tab you will be able to see Zoints created by other users who have added you in their contacts while creating/editing Zoint. Zoints created by others also gets added when you join their Zoints for the first time either if you are logged in your account or enter your email ID while joining the Zoint.
My Recording
In My recordings tab, you will see all your recordings listed with date and time when it was recorded. You can filter the recordings based on your Zoint names or meeting names. You can play any of the listed recordings from here, copy the recording links and send those to participants or anyone else who needs to get access to it. You can even delete the recordings if you no more need those.

Settings
In settings tab, there are five sections-
My Profile: Here you can set your profile details
My Attendance: Here you will be able to see attendance details for all the users who have joined
the meeting
My Contact: You can add contact details.
My Subscription: Here you can subscribe to our attractive subscription plans.
Meeting Features
Now let’s see how to use meeting features...
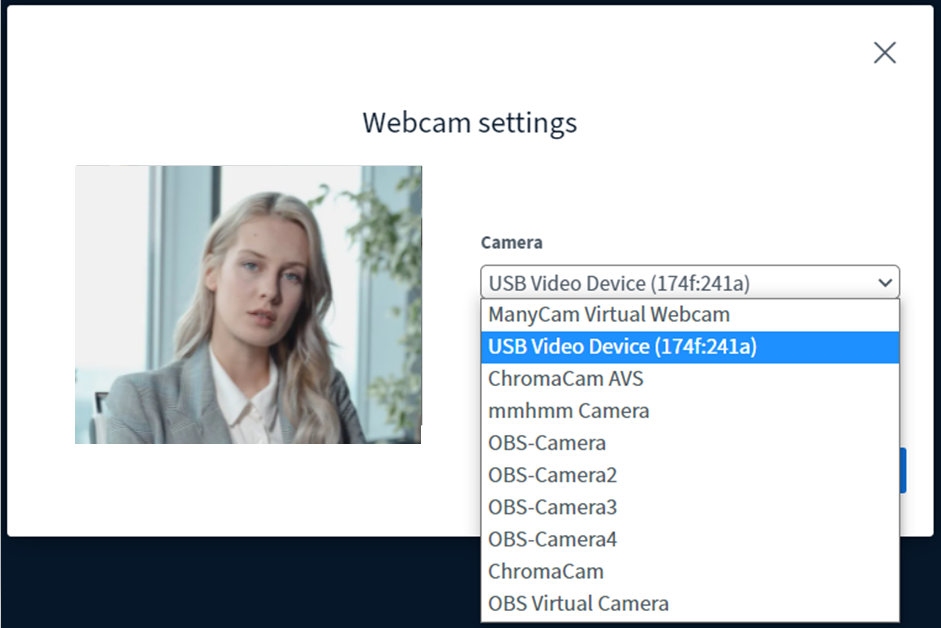
Before you join the meeting make sure that your device microphone and speakers are working properly. Use
headphone for best experience. While joining the meeting you might be prompted to allow the microphone
and camera.
Please allow it.
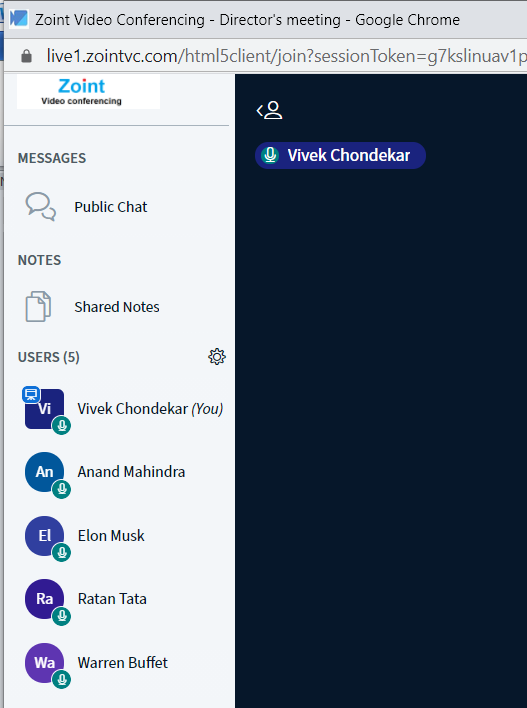
Once you join the meeting you can see

Public chat, Shared notes and User list on left side of the window.
Action button
+ Icon to add

It will allow you to do the below
- Upload presentation files,
- Start a polling and ,
- To share an external video.
Leave Audio button

Click of this button will take you to listen only mode and your mic button will vanish. If you click this button again it will join you to the meeting with mic on.
Note that, if your audio is disconnected while the meeting is in progress, you can click on this button to re-join with mic.
User List
This will show the list of participants joined the meeting.
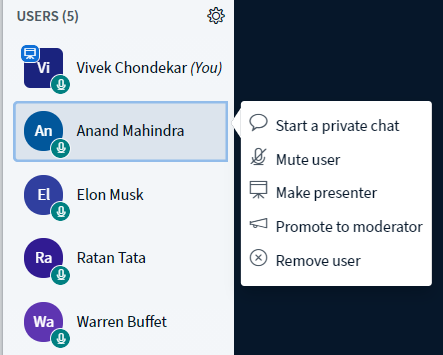
If the user is meeting owner or moderator, he/she can control participant’s access by selecting the user and with left click on the particular user, a private chat can be started, user can be muted, made presenter, promoted as moderator and can be removed.
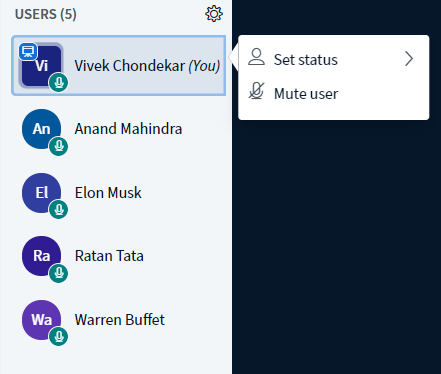
User can change his/her status and also mute/unmute himself/herself by left click on his/her own name –
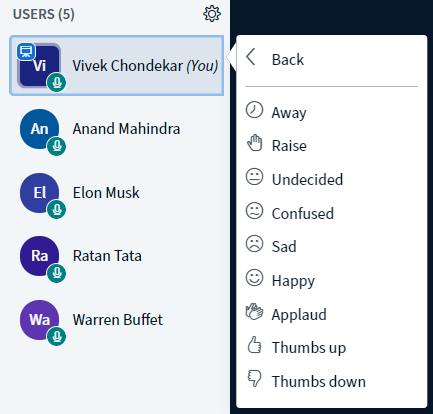
Clicking on set status given multiple options –
Then there is a public chat window and presentation area on the right. You can copy the meeting invite from public chat window as well to send to others to join the current meeting.

Presentation window will by default have a whiteboard.
Below the presentation area, there are 5 buttons as shown in above figure. The one with + sign
is action
button.
It will allow you to upload presentation files, start a polling and to share an external video.

Public Chat
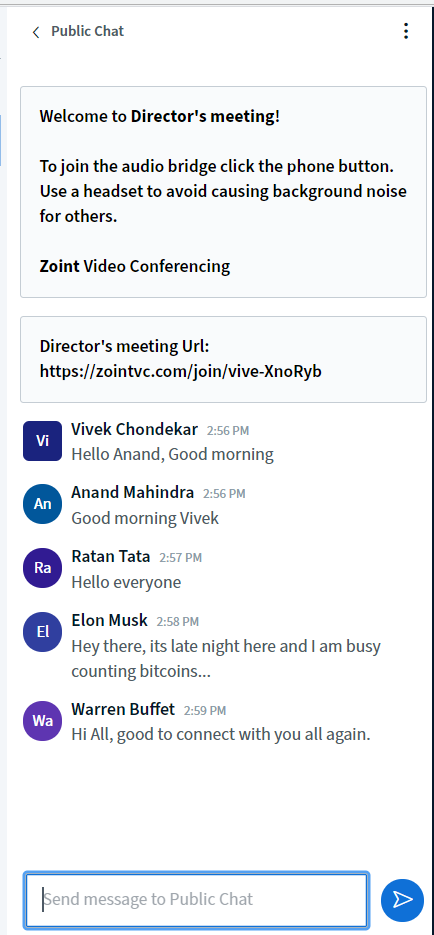
Public chat is seen by all the participants and is used for common discussion. Here meeting details are also available for moderators/meeting owners which can shared with someone while the meeting is in progress –
Shared notes
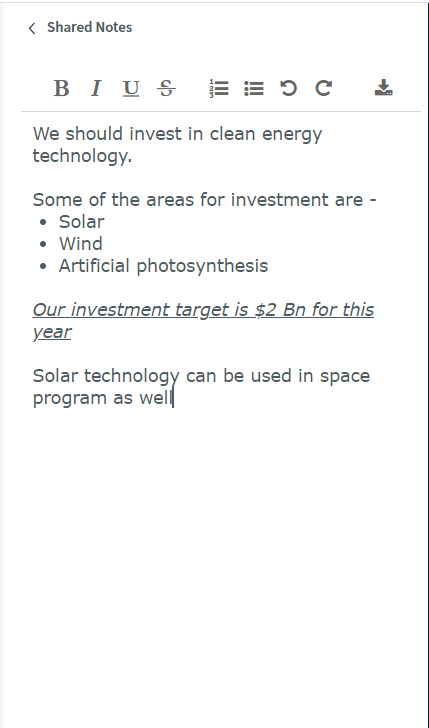
Clicking on shared notes opens up a frame for collaborative sharing notes by all the participants. They can write text while discussing during the meeting.
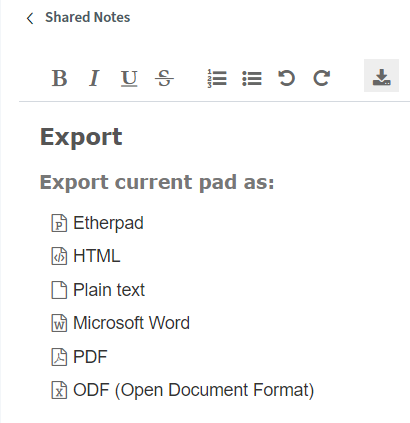
At the end of meeting, shared notes can also be downloaded in different formats.
Upload Presentation
Click on Upload a presentation to upload single or multiple files by dragging the files or by browsing to file location folders.


When files are selected, confirm button changes to upload. Click on it to upload the files.

Let’s assume you are teaching some topic. You can upload the presentation related to that topic and also some illustrative figures. You can choose the presentation or the image file based on what you are teaching at that point.
If you want to talk about the figure you can choose the figure which should appear in the presentation area. This can be done by going back to upload presentation page. You can annotate using the whiteboard tool on the right to explain the figure in detail.
Start a Poll
You can also use poll if you want to get the poll survey from the participants.

You can use the default poll formats or create your own custom poll. When you click on Action button and select survey, you get below in window.

Using the tool box on the right you can use the whiteboard for your teaching. You can use pen to write or draw anything on the whiteboard. There is text tool to type in the text and you can even draw shapes.

If the whiteboard page is completely filled you can move to next page. Whiteboard can also me made multiuser interactive that can allow other participants to interact on the whiteboard.

Students can enter into full screen mode by clicking on the full screen icon at the bottom of presentation area.


